


Blog

How to Use 10 Fingers for Touch ID on your iPhone
Apple may have moved on from Touch ID to Face ID in newer models but there are still iPhones out there that support Touch ID. Even iOS 12 still supports it. iPhones ranging from 5S to 8 Plus all still bear the signature touch ID to unlock the phone. If you’re using touch ID you might already know that you can add anywhere up to 5 fingers. But little did you now you can add more of them, 5 more to be exact. This is you can do with a little known trick. So this post will be on how to use 10 fingers for touch ID on your iPhone. Without further ado let’s see how this can be done.
Apple not advertising How to use 10 fingers for Touch ID on your iPhone?
Apple doesn’t really advertise this feature as you know- a feature. They do not do this as this is not really a feature in the first place. The trick employed in getting 10 fingers registered actually makes use of touch IDs own registration process which apparently allows you to register only one fingerprint.
In the registration processes there are 5 times that you can add the same finger to get a better fingerprint while scanning but did you know that you can actually use different fingers for all five scans? This gets each one registered. Using this trick in how to use 10 fingers for touch ID on your iPhone you can get all 10 of your fingerprints registered.
The first step in How to use 10 fingers for Touch ID on your iPhone:
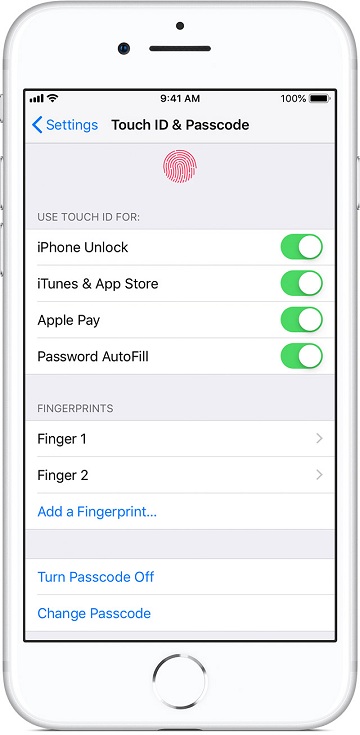
The first step in the process involves you going to settings and then to the Touch ID and passcode section. Once there you just enter your passcode to get the ball rolling or if don’t already have one there’ll be the option to add a fingerprint.
In cases where you already have one fingerprint stored, that fingerprint will be listed with the name you initially gave it on setup. The next step depends on how many fingerprints you want to register.
The second step in How to use 10 fingers for Touch ID on your iPhone:
In the second step of the process, you have to delete all previous fingerprints stored. This you do if you want to add 10 fingerprints. You can add 5 of yours and 5 of someone else’s too. In cases where you want just 6 of your own fingers registered you just have to free up one slot.
In many case you might already have added your thumb as the main finger. Mainly because it is easier to access your iPhone with your thumb. In such cases you just have to keep that as normal while adding 8 more fingerprints as a backup. These 8 other fingers you can use when you temporarily can’t use your thumb. You can then decide which fingers you want registered based on your usage.
Once all that is over with, you just have to tap on the fingerprint’s name and press delete fingerprint. Continue to do this till all the necessary slots are open.
Step 3 in the process:
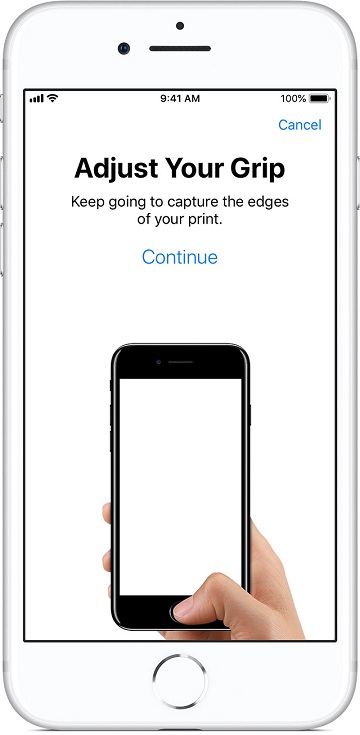
During the registration process, iOS will ask you to scan your finger twice to get better accuracy. In one scan it gets your finger’s main middle area while in the second scan its gets outside edges of the finger. This is done so that no matter how you hold your device, in whichever direction your finger is in, you’ll be able to unlock it in one go.
This is the reason why you might want to just scan 9 fingers in total instead of 10 to get 2 scans for your more favored finger.
When you want to start a scan just press add a fingerprint .if you’re doing it the first time or you don’t have any prior fingerprints stored then you’ll get an explanation of how you must do it. All you have to do is press your finger on the touch ID button to get going. If you’ve already got fingers scanned then you can move directly onto the initial place your finger section without going through the explanations stage.
The two methods in how to use 10 fingers for touch ID on your iPhone:
The first step is about scanning your main finger, when doing so you have to move your finger a bit so that all areas of it get scanned. When the phone has got all that it needs it will ask you to adjust your grip. Then tap continue.
After that, scan your second finger in much the same way and press continue once it is done.
This was the easier method. The other method is a little more complicated. The other method is to scan each finger alternatively. First scan one finger then the buzz then place your second finger and wait for the buzz sound. Continue like this till you get all fingers scanned. This method is a tad confusing so we recommend the first one. As for effectiveness both seem to work just as well as the other.
Step 4:
After the last stage you have to now give names to all your scans. You can do so by tapping on the new scan and giving it a name. A little tip-give names according to the finger you’ve just scanned so as to avoid scanning the same finger twice.
Finally when you need to use Apple Pay or AutoFill for passwords or any other place where you might need your fingerprint, any of the fingerprints scanned will work well. At most times you won’t even know the difference. In some cases you might get the try again option since the accuracy of your fingerprints might suffer since you took just one scan of it.
